
Instrukcja obsługi Broncolor Siros 800 S WiFi / RFS 2
Poniższe instrukcje obsługi Broncolor Siros 800 S są reprodukcją oficjalnych materiałów producenta, do których PhotoRobot klienci mogą szybko się odnaleźć. Materiały te mają na celu wsparcie wstępnego zrozumienia i samodzielnego działania urządzenia Broncolor Siros 800 S. Należy jednak pamiętać, że światła Broncolor są zarządzane bezpośrednio w PhotoRobot _Controls aplikacji. Zapewnia to brak konieczności instalowania sterowników do zarządzania sprzętem Broncolor po stronie klienta.
Aby uzyskać informacje techniczne dotyczące komponentów sprzętowych, narzędzi programowych, trybów głównych i zalecanych ustawień dla lamp Broncolor z PhotoRobot, zapoznaj się z PhotoRobot – Broncolor Lighting Management.
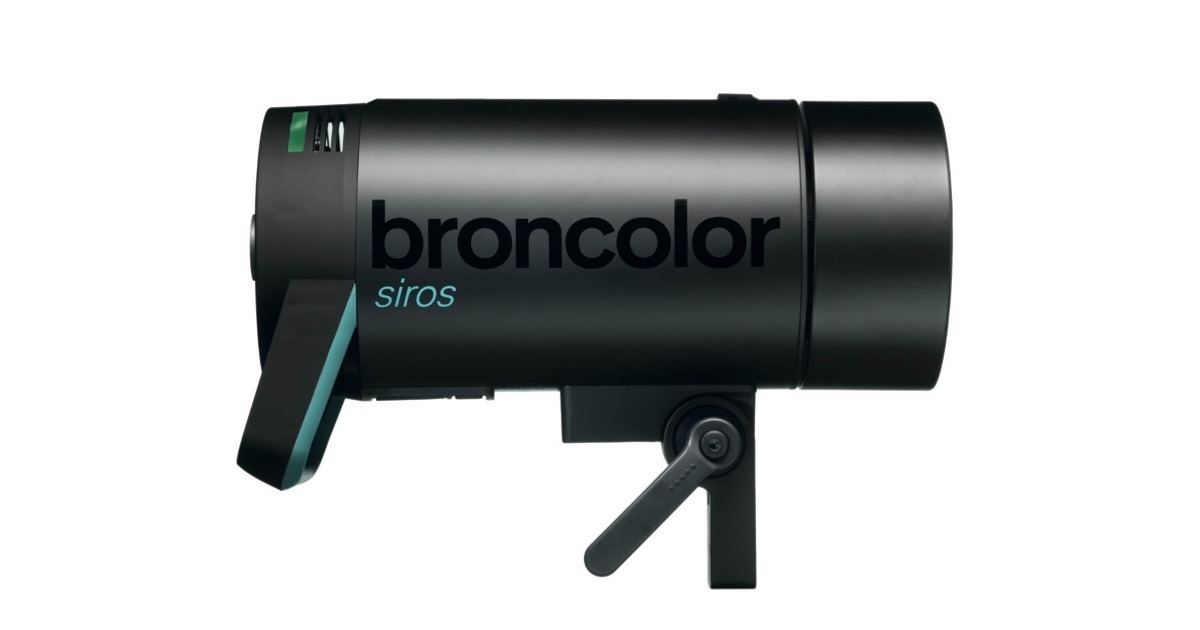
Uwaga: Te instrukcje obsługi są reprodukcją oficjalnych instrukcji obsługi producenta dla lamp studyjnych Broncolor Siros 8 S series. Oryginalną dokumentację dotyczącą Twojego produktu można znaleźć na stronie producenta broncolor.swiss . Jednocześnie pamiętaj, aby przed pierwszym użyciem zapoznać się z instrukcjami dołączonymi do urządzenia.
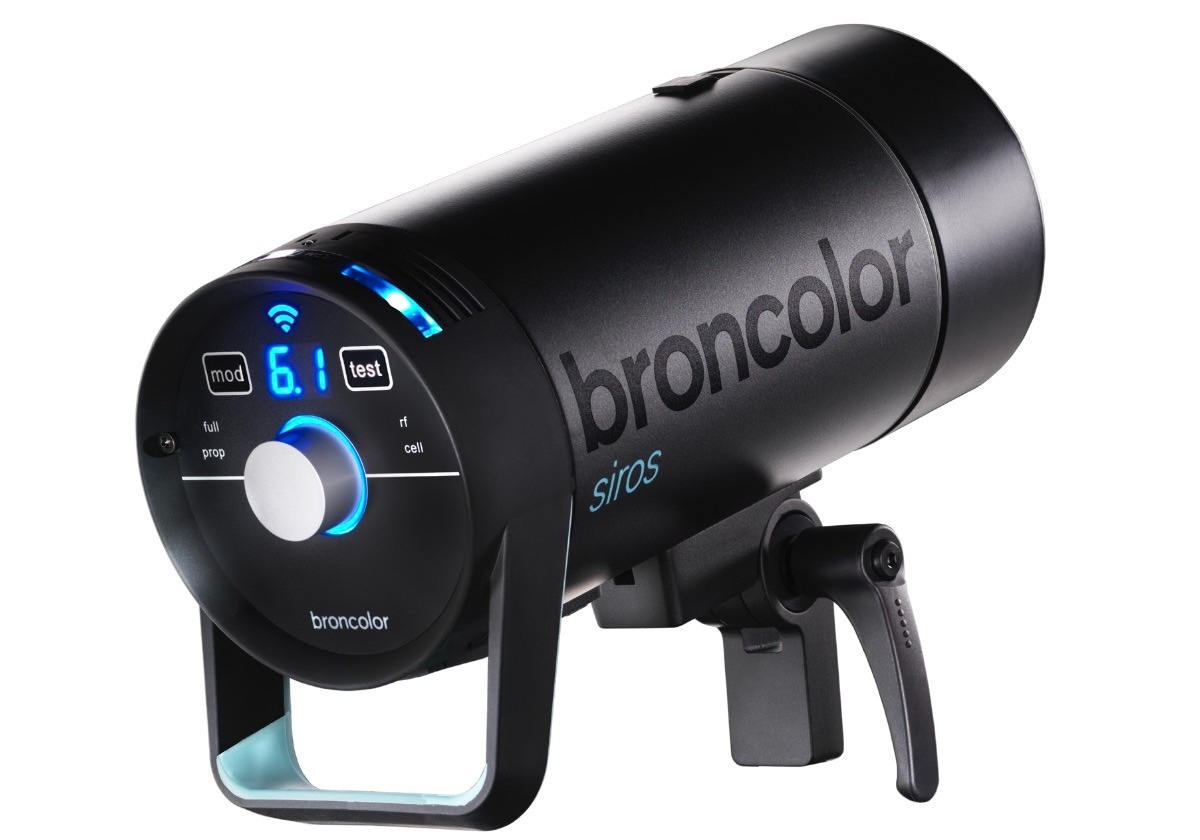
Sterowanie i wyświetlacze
Sterowanie i wyświetlacze dla Broncolor Siros 800 S są następujące.
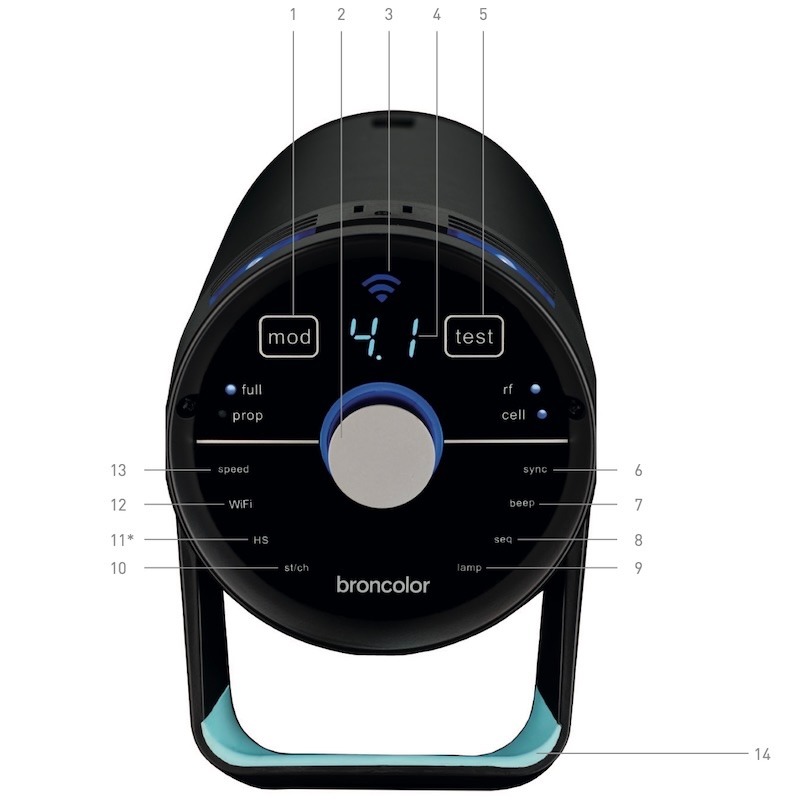
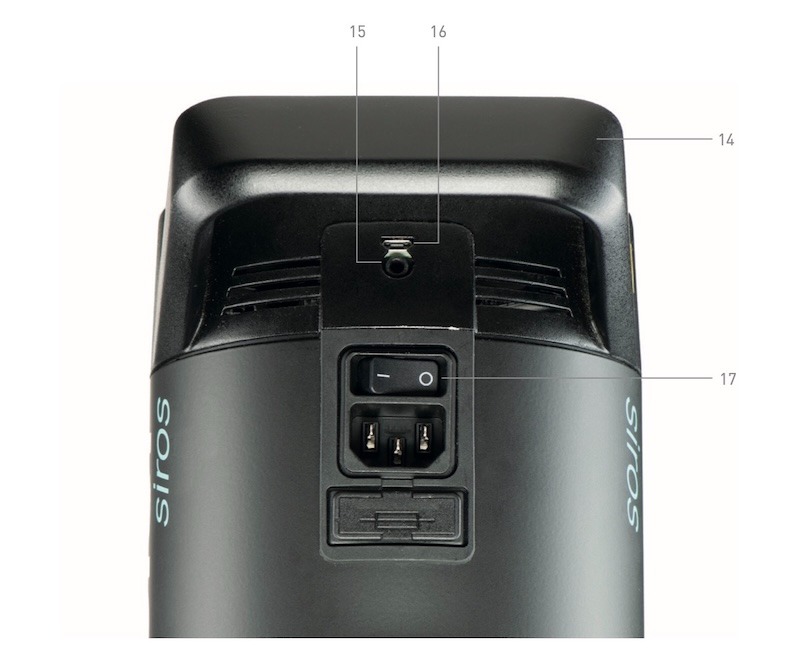
- Światło modelarskie włączone/wyłączone
- Kontroler obrotowy
- Wyświetlacz WiFi
- Cyfrowy wyświetlacz dystrybucji energii
- Klucz "test"
- Ustawienia menu
- Ustawienia menu
- Ustawienia menu
- Ustawienia menu
- Ustawienia menu
- Ustawienia menu
- Ustawienia menu
- Ustawienia menu
- Uchwyt
- Gniazdo synchronizacji
- Mini USB
- Przełącznik sieciowy
Przed użyciem
Broncolor Siros S to produkt wysokiej jakości, który zapewnia wieloletnie użytkowanie, jeśli jest używany prawidłowo. Koniecznie przeczytaj wszystkie informacje zawarte w tych instrukcjach obsługi, które zawierają także ważne instrukcje dotyczące użytkowania i konserwacji urządzenia. Kieruj kolejnych użytkowników do tych instrukcji, aby zapoznać nowych użytkowników z urządzeniem, jego użytkowaniem i konserwacją. Dodatkowo zawsze przestrzegaj instrukcji bezpieczeństwa podane osobno dla urządzenia od Broncolor.
Spis treści
- Zakres zaopatrzenia
- Pierwsze uruchomienie
- Elementy sterujące
- Przegląd funkcji menu głównego
- Nawigacja menu
- Kontrola czasów błysków
- Premiera
- Funkcja HS
- Funkcje specjalne
- Informacje i komunikaty o awariach
- Najczęściej zadawane pytania
- Akcesoria
- Konserwacja / Naprawy
- Informacje o ochronie środowiska
- Gwarancja i powiadomienie dla klientów z Wielkiej Brytanii
- Dane techniczne
1. Zakres dostaw
1.1. Siros 800 S WiFi / RFS 2 – 31.643.XX
Po pierwsze, upewnij się, że otrzymałeś następujące przedmioty w ramach dostawy.
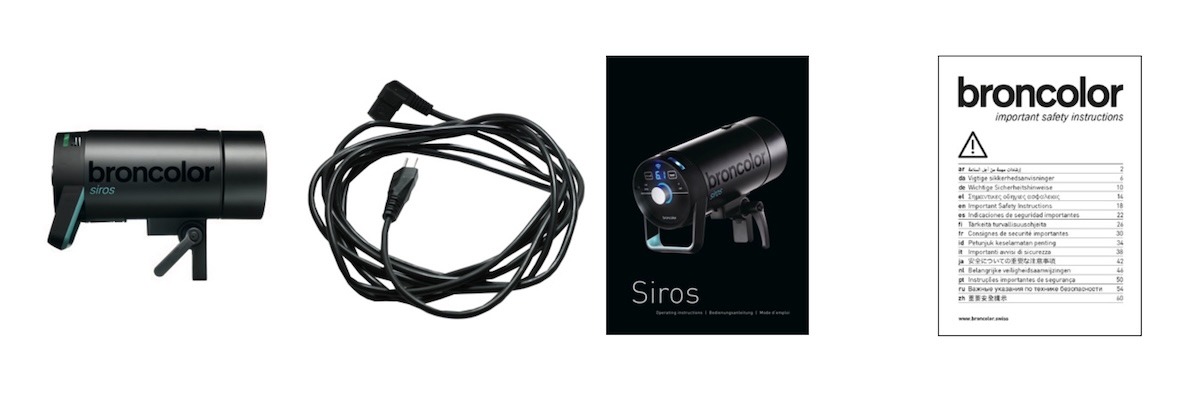
- Siros S Monolight
- Kabel sieciowy
- Instrukcje obsługi (BA109.00)
- Ważne instrukcje bezpieczeństwa (WA-18-1)
1.2. Zestawy
Zawartość zestawu Ekspertów Siros obejmuje:
- 2× Siros 800 S WiFi / RFS 2
- 1× Parasol, 85 cm (33.574.00)
- 1× Softbox 60 x 60 (33.561.00)
- 1× Speed Ring (33.401.00)
- 2× Junior Stand AC (35.100.00)
- 1× Torba Błyskowa 2 (36.532.00)
- 1× Torba na akcesoria (36.535.00)
- 1× Kabel synchronizacyjny (34.111.00)
Zawartość zestawu Pro Kit Siros obejmuje:
- 3× Siros 800 S WiFi / RFS 2
- 1× Softbox 60 x 60 (33.561.00)
- 1× Oktabox 75 (33.600.00)
- 2× Pierścień Prędkości (33.401.00)
- 2× Standardowy reflektor L40 (33.115.00)
- 3× Junior Stand AC (35.100.00)
- 1× Torba Błyskawiczne 3 (36.533.00)
- 1× Torba na akcesoria (36.535.00)
- 1× Kabel synchronizacyjny (34.111.00)
2. Pierwsze uruchomienie
2.1. Zdejmij osłonę ochronną
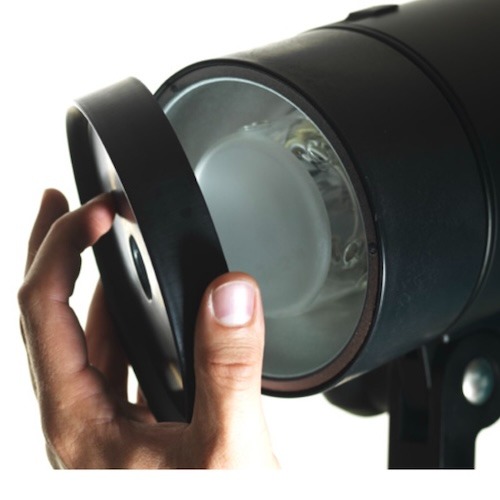
2.2. Podłącz kabel sieciowy
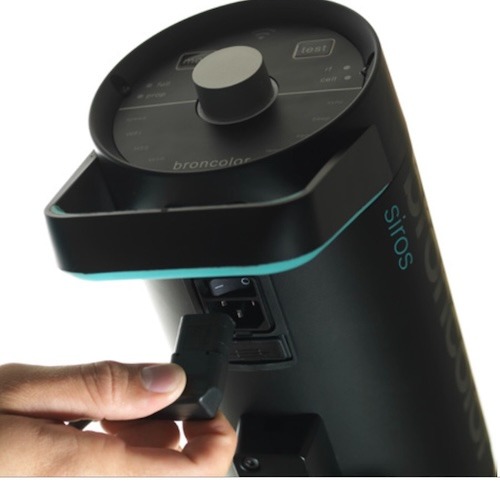
2.3. Włącz jednostkę NA głównym przełączniku
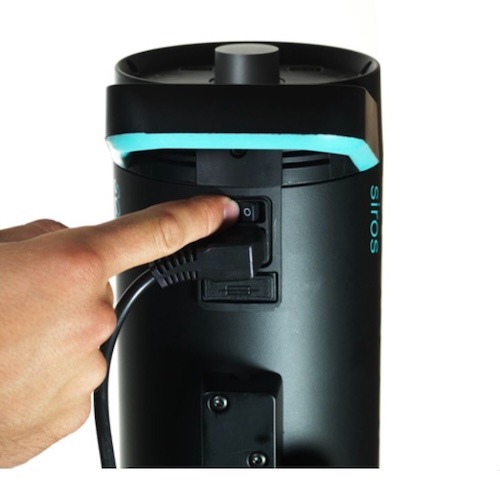
3. Elementy sterujące
3.1. Funkcje elementów
Kontroler obrotowy (2)

- Kontroler obrotowy (2) służy do włączania i wyłączania urządzenia (tryb czuwania). Naciśnięcie kontrolera obrotowego przez 3 sekundy przełącza urządzenie w tryb czuwania.
- W menu kontroler obrotowy umożliwia nawigację po menu i potwierdzanie elementów menu. Dalsze wyjaśnienie nawigacji po menu znajduje się w rozdziale 5.
- Podczas pracy kontroler obrotowy zmienia energię błysku. Obracanie przeciwnie do ruchu wskazówek zegara zmniejsza energię błysku, podczas gdy obracanie zgodnie z ruchem wskazówek zegara ją zwiększa. Tymczasem powolne obracanie kontrolera zmienia ją w krokach 1/10 przysłony i szybkie ("skręcanie") w krokach 1/1 przysłony.
Wyświetlacz informacji (4)
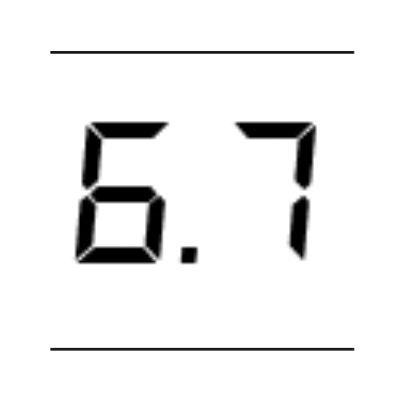
- Wyświetlacz informacyjny (4) pokazuje wybraną energię błysku lub opcje wyboru w menu.
Mod - Światła modelowania WŁĄCZONE/WYŁĄCZONE (1)
- Użyj "mod" (1), aby włączyć lub wyłączyć lampkę modelingową. Dłuższe naciśnięcie przycisku zmienia tryb pracy z "pełnego" na "prop" lub odwrotnie.
Test (5)
- Użycie "test" (5) rozpoczyna test. Wyświetlacz "Gotowy" wokół kontrolera obrotowego zmienia się na niebieski zaraz po zakończeniu operacji ładowania/rozładowania.
3.2. Funkcje menu
Prędkość (13)
- Opcja "prędkość" (13) służy do szybkiego ładowania i czasu migania. Dalsze wyjaśnienia znajdziesz w rozdziale 6 tych instrukcji obsługi.
WiFi (12)
- "WiFi" (12) oznacza, czy WiFi jest włączone czy wyłączone.
HS (11)

- "HS" oznacza, czy HS jest włączony czy wyłączony.
Studio / Kanał (10)
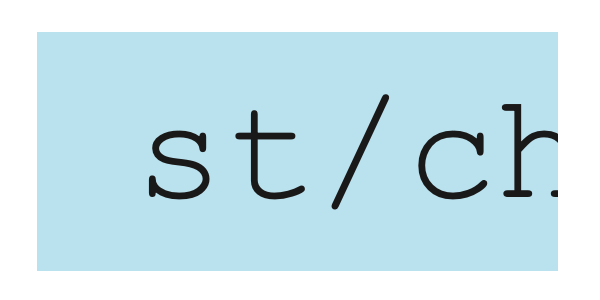
- Ustawienie menu "st / ch" (10) służy do zmiany studia / kanału. Użyj go, aby zmienić aktualny kanał studyjny (RFS 2).
Lampa (9)

- Użyj lampy ustawienia menu (9), aby wybrać kanał lampy (RFS 2).
Sekwencja (8)
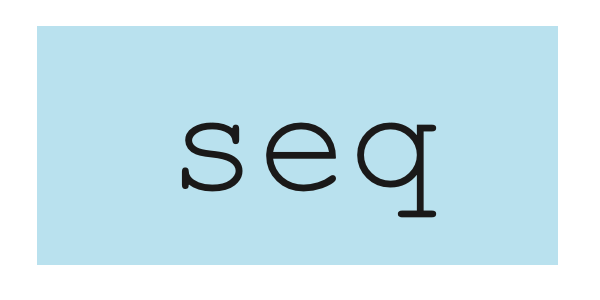
- Ustawienie menu "seq" (8) wybiera liczbę migań.
Piknięcie (7)
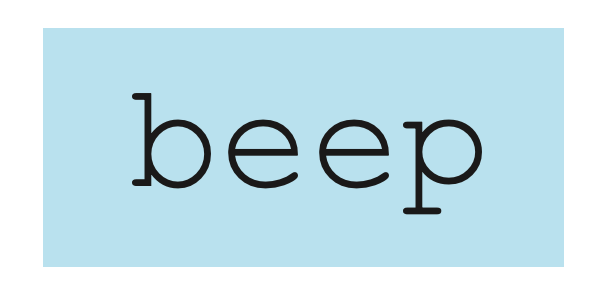
- Funkcja menu "beep" (7) pokazuje, czy akustyczne ostrzeżenie "Ready" jest włączone lub wyłączone.
Synchronizacja (6)
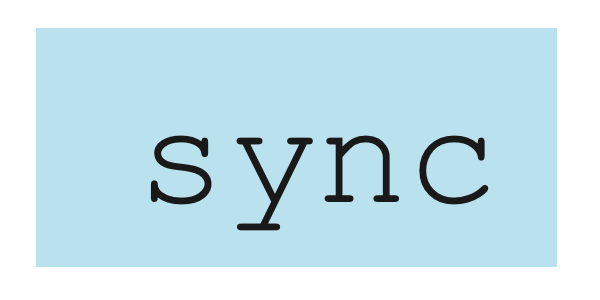
- Użycie "sync" (6) pozwala na wybór różnych metod uwalniania (fotokomórka, radio, fotokomórka i/lub radio).
Gniazdo Sync / Mini USB (15 / 16)

- Użyj funkcji menu : gniazdo sync / Mini USB (15/16) do odblokowania przez kabel synchronizacyjny lub aktualizacja oprogramowania przez mini USB.
On / Off (17)

- Używaj włącz/wyłącz (17) na urządzeniu, aby go włączyć lub wyłączyć.
4. Przegląd głównych funkcji
Główne funkcje są następujące.
- Aby wejść do menu głównego, naciśnij kontroler obrotowy (2).
- Obróć kontroler obrotowy (2) zgodnie z ruchem wskazówek zegara lub przeciwnie, aby dotrzeć do wymaganego elementu menu.
- Aby potwierdzić wybór, naciśnij ponownie kontroler obrotowy (2). Wybrany element menu zaczyna migać.
5. Nawigacja w menu
Funkcje menu Broncolor Siros 800 S obejmują:
- prędkość
- WiFi
- HS
- st/ch
- lampa
- seq
- bip
- synchronizacja
Po naciśnięciu obrotowego kontrolera (2) wchodzisz do głównego menu monolight. Stamtąd masz dostęp do różnych funkcji.
Prosimy zauważyć: Jeśli nie można wybrać pozycji z menu, na przykład w przypadku produktów innych niż Siros 800 S, urządzenie nie obsługuje tej funkcji.
Przykład: Ustaw sekwencję 15 błysków na każde wypuszczenie.
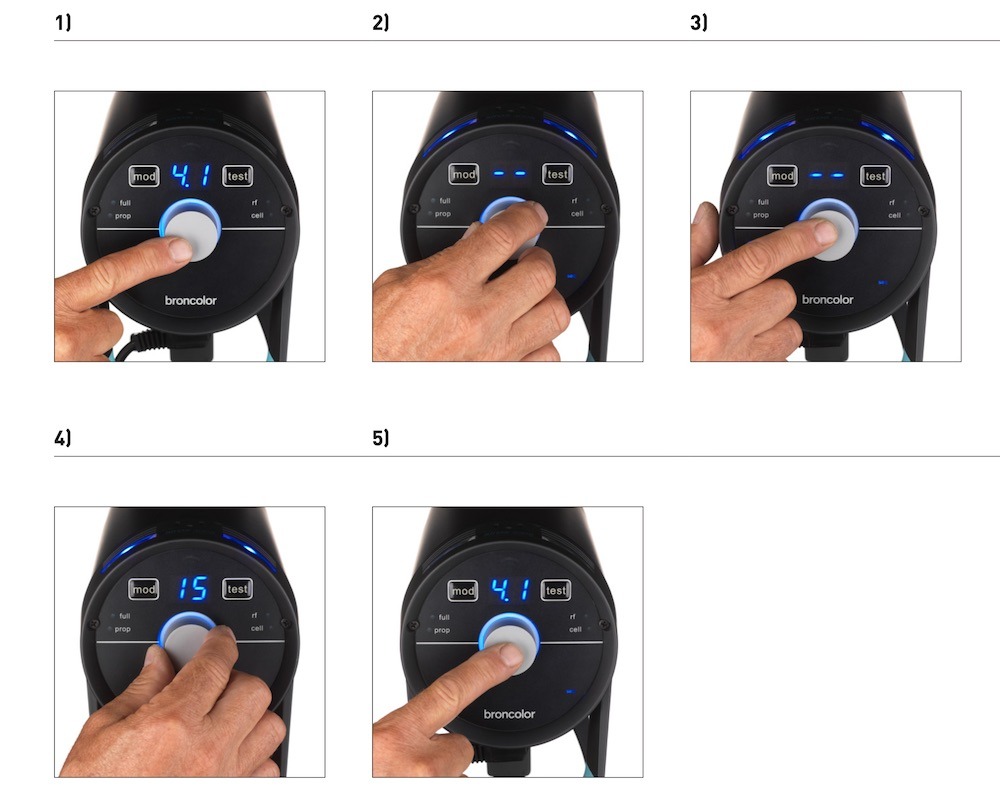
- Naciśnij kontroler obrotowy (2), aby wejść do menu głównego. Wyświetlony zostanie ostatnio wybrany element menu. Główny wyświetlacz zmienia się z wyświetlania mocy wyjściowej na wybrany element menu.
- Obróć kontroler obrotowy (2), aż dotrzesz do pozycji menu "seq".
- Naciśnij kontroler obrotowy (2), aby potwierdzić tę funkcję. Wyświetlacz "seq" zaczyna migać.
- Obróć kontroler obrotowy (2), aż na głównym wyświetlaczu pojawi się "15".
- Potwierdź ten wybór, naciskając kontroler obrotowy (2). Po tym potwierdzeniu jednostka przełącza się do stanu normalnego. Jeśli wybór nie zostanie potwierdzony w ciągu 5 sekund, urządzenie przełącza się do stanu normalnego bez zmiany ustawienia.
6. Kontrola czasów błysku
W menu głównym możesz ustawić czas błysku na "prędkość". To ustawienie oblicza najszybszy możliwy czas błysku dla wybranego poziomu energii. Może to również powodować lekkie przesunięcie koloru błysku w stronę niebieskiego obszaru.
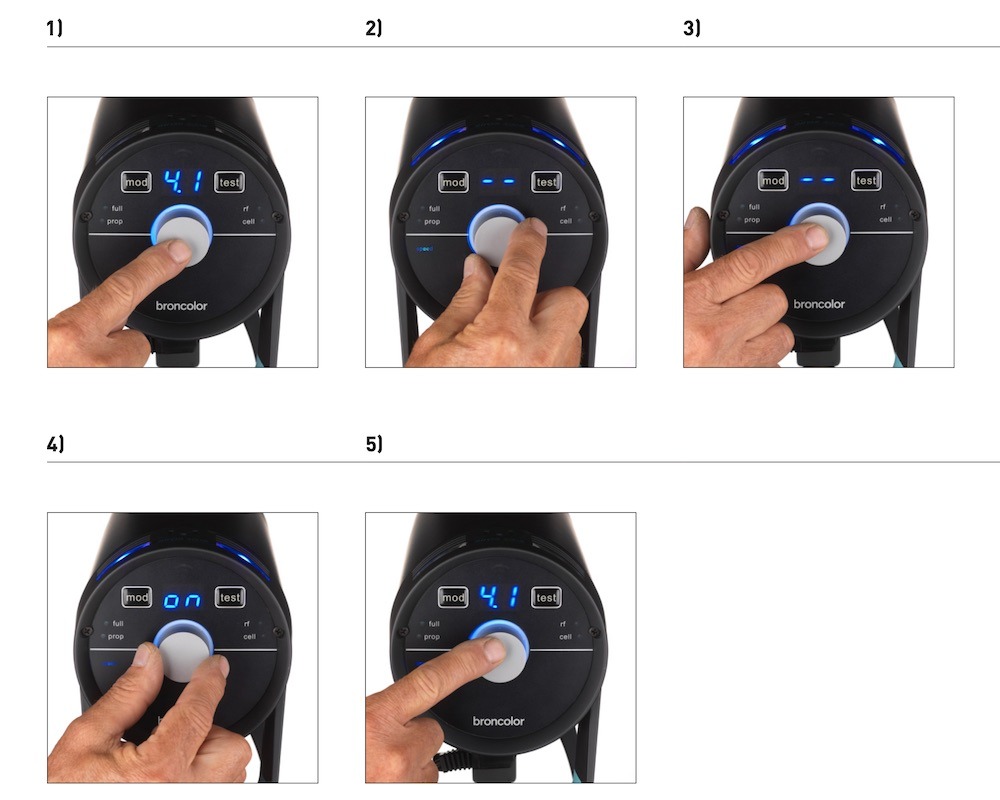
- Naciśnij kontroler obrotowy (2), aby wejść do menu głównego.
- Obróć kontroler obrotowy (2), aż osiągniesz element menu "prędkość".
- Potwierdź ten wybór, naciskając kontroler obrotowy (2).
- Użyj kontrolera obrotowego (2), aby wybrać opcję "włącz" lub "wyłącz".
- Potwierdź to z kontrolerem obrotowym (2).
7. Wydanie
7.1. Moduł RFS 2 (System Radiowy)
Dla sterowania lampą błyskową RFS 2 kanał (adres studia) musi odpowiadać kanałowi nadajnika. Adres studia jest ustawiony w menu na pozycji "st". Kanał lampy jest zdefiniowany w menu pod "lamp". Więcej informacji o zmianie kolorów lamp poznawczych można znaleźć w sekcji 9.3.
Dzięki transceiverowi radiowemu możesz zdefiniować i ustawić poszczególne lampy według własnego uznania. Aby dowiedzieć się, jak to zrobić, zapoznaj się z instrukcjami obsługi transceivera. Transceiver nie jest standardowo dołączany do poszczególnych głowic.
7.2. Fotokomórka (komórka)
Fotokomórkę można włączać i wyłączać za pomocą funkcji menu "sync" (6). Gdy jest aktywna, zapala się niebieska dioda LED obok etykiety "cell". Po pierwszym błysku sekwencji aktywna fotokomórka jest dezaktywowana, a niebieska dioda LED obok klawisza "sync" (6) miga. Naciśnięcie klawisza "test" ponownie ją włącza.
7.3. Gniazdo synchronizacyjne (15)
Kable synchronizujące – 5 m (16,4 stopy) (art. nr 34.111.00) i 10 m (32,8 stopy) (34.112.00) – można zamontować do gniazda do zwalniania kabla (15).
7.4. "test" Klucz (5)
Za pomocą tego klawisza monolight można wyzwalać ręcznie. Błysk może być wyzwalany zaraz po osiągnięciu 70% ustawionego poziomu energii. Wizualny wskaźnik "Gotowość" natomiast zapala się dopiero po osiągnięciu 100%.
8. Funkcja HS.
W połączeniu z nadajnikiem RFS 2.2 można używać monoświatła Siros 800 S z niezwykle szybkimi czasami naświetlania. Na przykład przy świetle otoczenia, nawet przy szeroko otwartej przysłonie (selektywna ostrość), obraz może być prawidłowo niedoświetlony do 1/8000s, a Siros pozwala ustawić dominujące i kreatywne efekty świetlne.
Wystarczy nadajnik RFS 2.2, dostępny dla aparatów Canon, Fuji, Nikon i Sony. Dodatkowo HS musi być aktywowany we wszystkich urządzeniach Siros. To modyfikuje krzywą błysku i gwarantuje, w połączeniu z RFS 2.2, poprawną ekspozycję bez ograniczeń wyboru czasu naświetlania.
Prosimy o zapoznanie się z instrukcjami obsługi nadajnika RFS 2.2, aby dowiedzieć się więcej o optymalnym wykorzystaniu funkcji HS.
Podczas pracy w trybie HS możesz używać tylko mocy lampy błyskowej od 4 do 10 z Siros.
9. Funkcje specjalne
9.1. Reset (do ustawień fabrycznych)
Naciśnij klawisz "test" (5) przez 4 sekundy. To resetuje wszystkie funkcje do ustawień fabrycznych. Reset potwierdzany jest podwójnym sygnałem dźwiękowym.
9.2. Aplikacja "bronControl" i ustawienia WiFi
Aby sterować swoim Siros Monolight, możesz także bezpłatnie pobrać aplikację "bronControl". Aby znaleźć aplikację, wyszukaj "bronControl" w Apple App Store lub w Google Play Store.
9.2.1. Tryby pracy
9.2.1.1. Działanie w trybie "prywatnym" (ustawienia fabryczne)
Jeśli tryb WiFi jest aktywowany na więcej niż jednym trybie monolight, wszystkie te urządzenia łączą się automatycznie z tym samym adresem studia, tworząc prywatną sieć. Smartfon lub tablet musi być wtedy połączony z tą siecią, aby ją kontrolować. Aby z tego skorzystać, aktywuj funkcję WiFi na smartfonie lub tablecie. Twoje urządzenie automatycznie wyszuka dostępne sieci WiFi. Połącz swój smartfon lub tablet z odpowiednią siecią Bron-Studio. Hasło do połączenia to: bronControl. Teraz uruchom aplikację "bronControl" na swoim urządzeniu. Dodaj odpowiedni numer studia w sekcji "dodaj nowe studio" i połącz aplikację z tym studiem. Aby uzyskać dalsze instrukcje dotyczące obsługi, skorzystaj z funkcji pomocy "?" w aplikacji.
9.2.1.2. Działanie w trybie "Enterprise"
Jeśli istnieje sieć WiFi (router), urządzenie można zintegrować z tą siecią za pomocą smartfona lub tabletu. Aby to osiągnąć, w aplikacji "bronControl", w ustawieniach, przejdź do "Ustawienia sieci" i wejdź w ustawienia routera w trybie "enterprise". Upewnij się, że urządzenia są ustawione na właściwy adres studia. Siros zapisuje ostatni typ połączenia i próbuje połączyć się z ostatnią siecią przy następnym uruchomieniu.
9.2.2. Ustawienia menu
Ustawienia menu są zdefiniowane następująco: włącz / wyłącz / synchronizacja (włączona / -- / sy).
9.2.3. Wyświetlacz WiFi (3) na urządzeniu
Symbole i ich opisy wyświetlacza WiFi (3) na urządzeniu są następujące.
9.3. Światła poznawcze
Gdy wybierane są różne kanały lampy (strefy), światło poznawcze na górnej powierzchni urządzenia zmienia kolor. Celem tego jest rozróżnienie poszczególnych jednostek, gdy są one sterowane przez aplikację "bronControl". Światło na urządzeniu zmienia kolor po aktywacji aplikacji na smartfonie lub tablecie lub po naciśnięciu rotacyjnego kontrolera na urządzeniu; po opuszczeniu menu zmienia się z powrotem na niebieskie.
Kolory kanałów lamp są następujące.
10. Informacje i komunikaty o błędach*
10.1. Sygnały akustyczne
Sygnały akustyczne to dźwięk piknięcia lub podwójny sygnał.
10.2. Komunikat wyświetlany
Uwaga: *Komunikaty o błędach są zawsze również sygnaleowane przez czerwoną lampkę poznawczą.
11. Najczęściej zadawane pytania
11.1. Wymiana lamp błyskowych
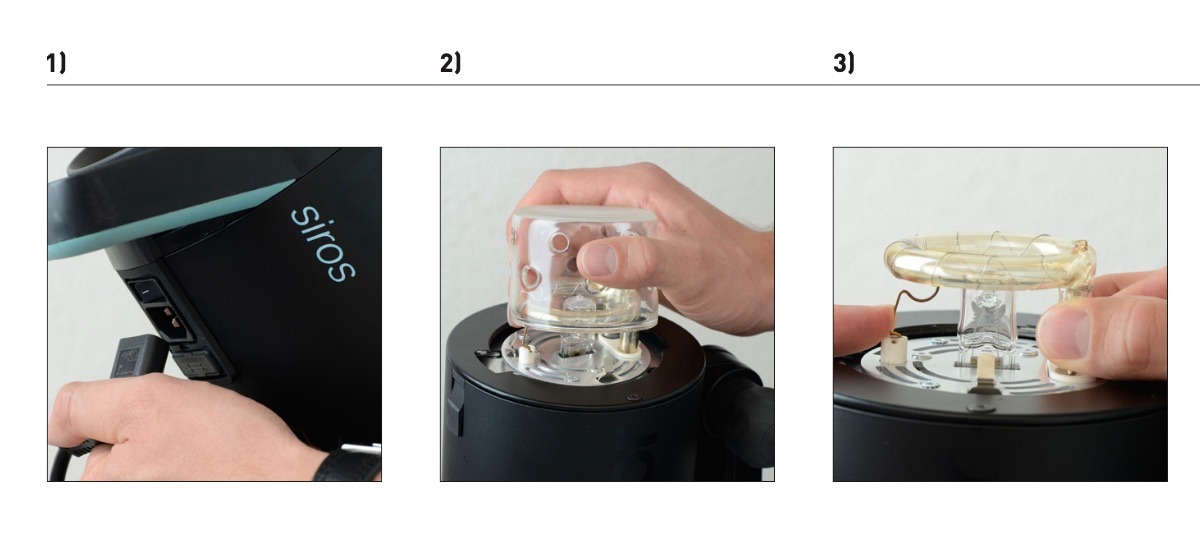
- Odłącz kabel sieciowy od urządzenia.
- Usuń szybę bezpieczeństwa, wyciągając ją z klipsów mocujących.
- Naciśnij sprężynę stykową w dół i ostrożnie wyciągnij lampkę błyskową.
11.2. Wymiana lontu
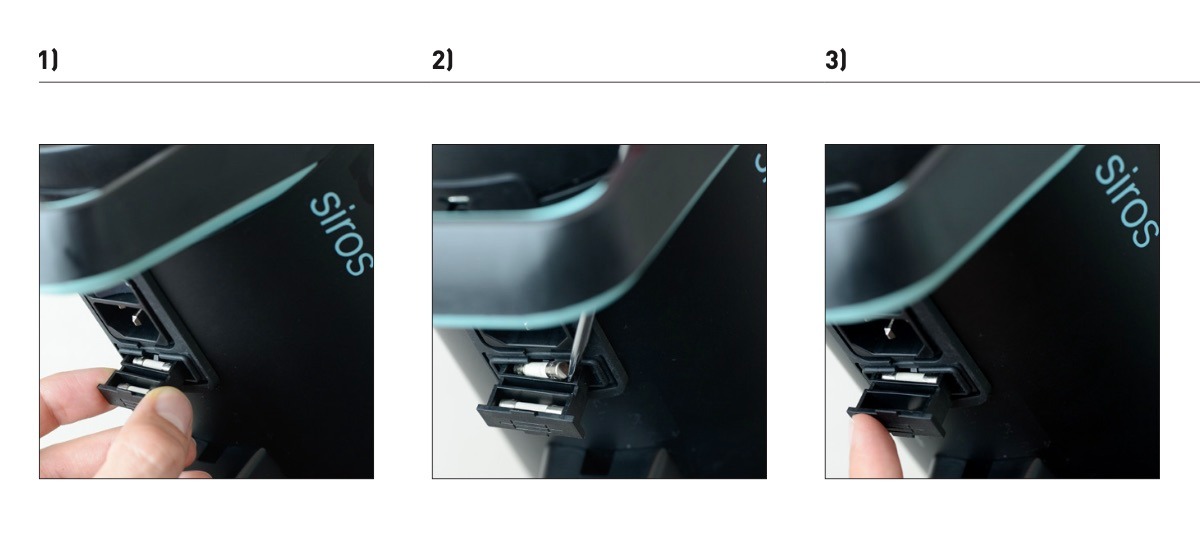
- Odłącz kabel sieciowy od urządzenia (patrz zdjęcie 1 powyżej). Otwórz komorę bezpieczników pod urządzeniem.
- Ostrożnie wyjmij przepalony lont ostrym przedmiotem.
- Włóż bezpiecznik zamienny i zamknij komorę bezpieczników
11.3. Zmieniający się kształtujący światła
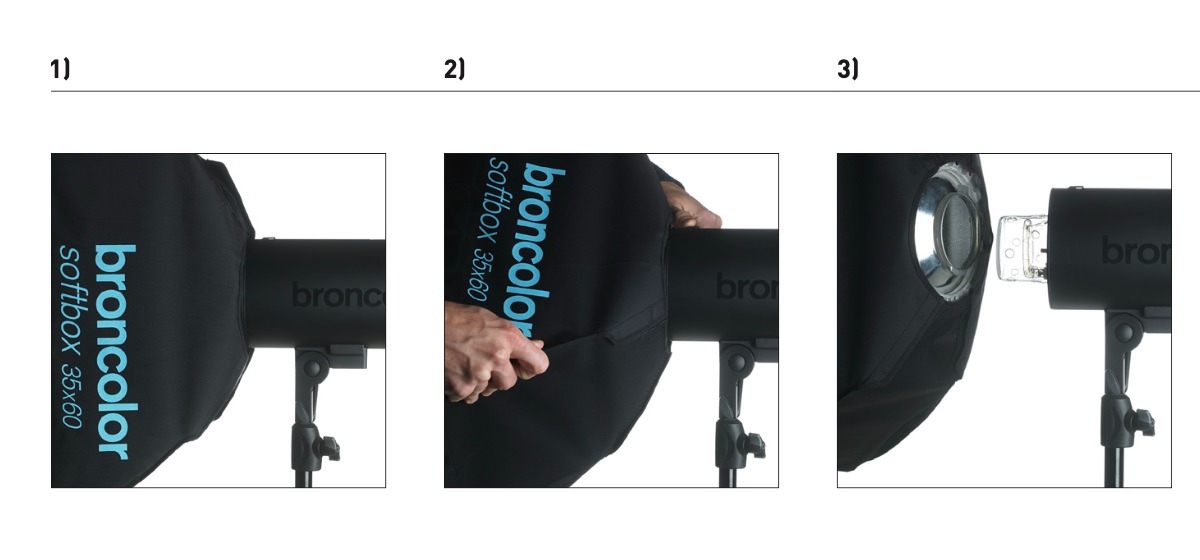
- Obróć kształtowacz światła w dowolnym kierunku do jego zatrzymania.
- Pociągnij zwalniacz do tyłu i jednocześnie obróć kształtarkę światła, aż uwolni ją od mocowania bagnetu.
- Ostrożnie usuń kształtarkę światła z przodu. Uważaj, aby nie uszkodzić szyby bezpieczeństwa.
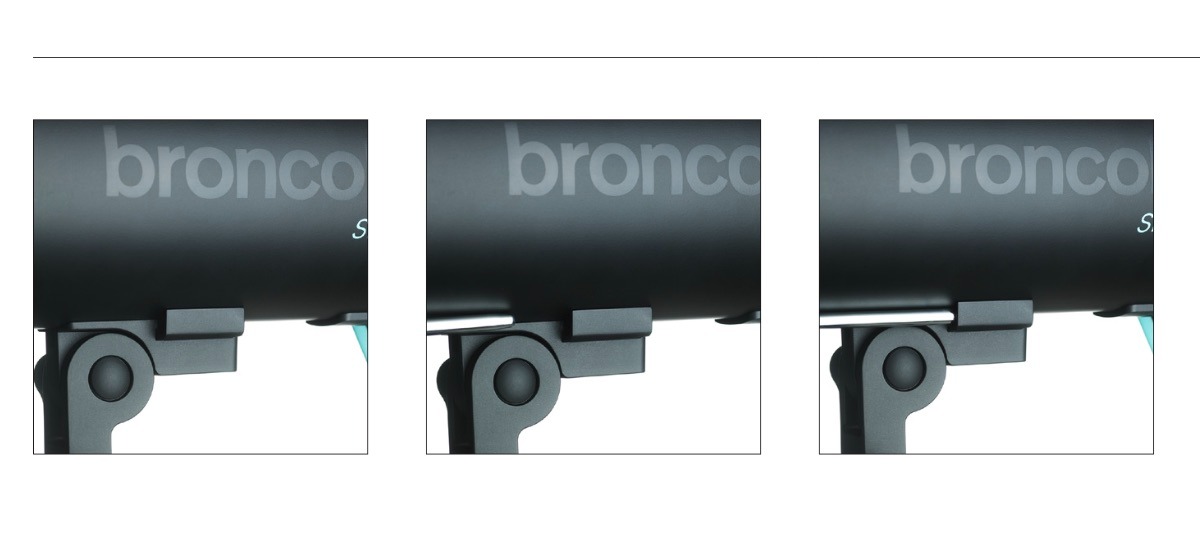
11.4. Montaż parasola
Aby zamontować parasol, zamontuj go w otworze znajdującym się pod urządzeniem.
12. Akcesoria
Siros jest kompatybilny z całą gamą kształtujących światło broncolor.
Poniższe elementy reprezentują specjalnie zalecane akcesoria:
13. Konserwacja i naprawy
Twój Broncolor Monolight to precyzyjny instrument, który może zapewnić lata bezproblemowej pracy, jeśli jest odpowiednio traktowany. Jednak jeśli wystąpi awaria, prosimy nie próbować samodzielnie otwierać urządzenia i naprawiać go. Nawet gdy urządzenie jest wyłączone, w środku mogą nadal występować niebezpieczne poziomy napięcia. Dlatego w przypadku konserwacji i napraw zawsze wysyłaj urządzenie do punktu serwisowego Broncolor.
14. Informacje o ochronie środowiska
Po zakończeniu okresu użytkowania ten produkt nie może być utylizowany jako zwykłe odpady domowe. Zamiast tego musi zostać odwieziony do punktu zbioru do recyklingu urządzeń elektrycznych i elektronicznych. Materiały te można poddać recyklingowi zgodnie z ich oznaczeniami. Poprzez ponowne użycie, recykling lub inne formy korzystania ze starych urządzeń, wnosisz istotny wkład w ochronę naszego środowiska.
Prosimy o popyt lokalne władze lub partnera handlowego Broncolor o odpowiedni punkt utylizacji.
15. Gwarancja
Wszystkie zasilacze, lampy, monolight i akcesoria Broncolor są wykonane według wysokich standardów jakości. Broncolor oferuje dwuletnią gwarancję fabryczną od daty zakupu (dla pierwszego właściciela) na powyższe produkty broncolor. Z tej gwarancji wykluczone są lampy błyskowe, lampy halogenowe, okulary ochronne, kable, baterie i tekstylia. Błędy wynikające z nieprzestrzegania instrukcji bezpieczeństwa, nieprawidłowego obchodzenia, użycia akcesoriów innego producenta, nieautoryzowanej interwencji lub modyfikacji są wyłączone z gwarancji fabrycznej. Broncolor / PhotoRobot nie ponosi odpowiedzialności za szkody wynikające z nieprzestrzegania instrukcji bezpieczeństwa, nieprawidłowego obchodzenia, użycia akcesoriów innego producenta lub nieautoryzowanej interwencji lub modyfikacji. W przypadku problemów technicznych prosimy o natychmiastowy kontakt z najbliższą autoryzowaną stacją serwisową Broncolor. Numery artykułów, opisy produktów oraz zakres dostawy mogą się różnić w zależności od kraju. Aby uzyskać bardziej szczegółowe informacje, prosimy o kontakt z partnerem sprzedażowym Broncolor. Z wyjątkiem błędów i pomyłek drukarskich.
16. Powiadomienie dla klientów z Wielkiej Brytanii
To urządzenie można skonfigurować do połączenia z bezprzewodową siecią LAN. Proszę skonfigurować ten produkt do połączenia z zabezpieczoną infrastrukturą. Nie używaj trybu konfiguracji do normalnego działania.
- Raporty o lukach bezpieczeństwa: support@broncolor.swiss
- Czas reakcji: 30 dni
- Zdefiniowany okres wsparcia w Wielkiej Brytanii: 2 lata po dacie sprzedaży, dotyczy tylko produktów sprzedawanych w Wielkiej Brytanii (z wyjątkiem Irlandii Północnej) w dniu 29 kwietnia 2024 roku lub później
- Nazwa producenta: Bron Elektronik AG
- Adres producenta: Hagmattstrasse 7, 4123 Allschwil, Szwajcaria
17. Dane techniczne


Seria EOS Rebel


Seria lustrzanek cyfrowych EOS


Seria bezlusterkowców EOS M


Seria PowerShot


Zbliżenie / Z ręki

Seria Canon EOS Rebel oferuje przyjazne dla początkujących lustrzanki cyfrowe z solidną jakością obrazu, intuicyjnym sterowaniem i wszechstronnymi funkcjami. Idealne dla entuzjastów fotografii, aparaty te zapewniają niezawodny autofokus, odchylane ekrany dotykowe i nagrywanie filmów Full HD lub 4K.
Połączenie
Rozdzielczość (MP)
Rezolucja
Seria lustrzanek cyfrowych Canon EOS zapewnia wysoką jakość zdjęć, szybki autofokus i wszechstronność, dzięki czemu idealnie nadaje się zarówno do fotografii, jak i produkcji wideo.
Połączenie
Rozdzielczość (MP)
Rezolucja
Seria bezlusterkowców Canon EOS M łączy w sobie kompaktową konstrukcję z wydajnością zbliżoną do lustrzanki cyfrowej. Wyposażone w wymienne obiektywy, szybki autofokus i wysokiej jakości czujniki obrazu, aparaty te są idealne dla podróżników i twórców treści poszukujących przenośności bez poświęcania jakości obrazu.
Połączenie
Rozdzielczość (MP)
Rezolucja
Seria Canon PowerShot to kompaktowe, łatwe w obsłudze aparaty dla okazjonalnych fotografów i entuzjastów. Dzięki modelom, od prostych aparatów typu point-and-shoot po zaawansowane kamery z zoomem, zapewniają wygodę, solidną jakość obrazu i funkcje, takie jak stabilizacja obrazu i wideo 4K.
Połączenie
Rozdzielczość (MP)
Rezolucja
Aparaty zbliżeniowe i ręczne firmy Canon zostały zaprojektowane z myślą o szczegółowym fotografowaniu i filmowaniu z bliska. Kompaktowe i łatwe w użyciu, oferują precyzyjną ostrość, obrazowanie w wysokiej rozdzielczości i wszechstronne możliwości makro — idealne do vlogowania, fotografii produktowej i kreatywnych zbliżeń.
Połączenie
Rozdzielczość (MP)
Rezolucja


